Imagine a society where type errors are the norm. As a society, we strive to evoke a sense of fairness and value a system based on a set of prescribed rules. As such, lawbreakers are punished for their ill actions. Now, envision a society where the majority of law offenders receive a non-guilty verdict, while law abiding citizens are punished for crimes they did not commit. This example is analogous to type I and II errors.
A measurement system, for example, that constantly measures good products as non-conforming is classified as a type I error system. Commonly referred to as the producer’s risk, the costs associated with producing products that are good but ends up as scrape due to the measurements system inaccuracies is totally absorbed by the producer. On the contrary, the consumer absorbs the risks of a type II error measurement system, when defective products are purchased. It is important to note that, regardless of the process capability, a measurement system can induce enough variation during the qualification process that can drive products into type I or II errors.
Measurement System Analysis (MSA) is the underlying principle and methodology for ensuring a measurement system is capable of producing accurate results. The goal of MSA is to ensure that the measurement method poses little variation as compared to the entire process variation. The system must be capable of accurate and reliable measurements. According to the Automotive Industry Action Group (AIAG) standards (Figure 2), a measurement system is acceptable when the variation is less than 10 percent of the total process variation. This ensures that the measurements obtained from the measurement device are mainly driven by the part to part variation and not the measurement device or gage used to measure. With that said, the measurement system can also be significantly influenced by the appraiser or person collecting the measurements. Therefore, MSA ensures not only the reliability and accuracy of the gage, but also a proper understanding of the entire measurement system, including appraisers and methods.

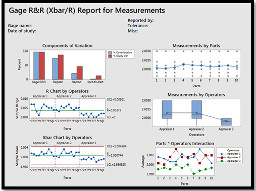
A common technique in determining the measurement system’s capability is the analysis of the gage regarding its repeatability and reproducibility (Gage R&R). A Gage R&R study consists of an experimental design for acquiring measurement data, followed with an analysis and interpretation using a statistical method. Repeatability addresses the precision of the gage, whereas, reproducibility involves variations between appraisers. According to AIAG, the experimental design for repeatability involves a single appraiser measuring at least 10 part features, 3 times in random order. Likewise, at least 3 appraisers, measuring at least 10 part features 3 times in random order for reproducibility. The data collected is analyzed using some statistical method. A common practice for statistical analyses are the Average and Range or Analysis of Variance (ANOVA) methods. Both methods, especially when used within a statistical software, such as Minitab, will differentiate the variation amongst part features, repeatability and reproducibility.
In summary, a measurement system that is inaccurate and unreliable can produce type I or type II errors. Such a system can classify good products as nonconforming and moreover, allow defective products to the end user. Regardless of how reliable the manufacturing process may be, qualifying products can make the process worthless, especially, where type I or II errors exists. Reducing type errors requires designing and developing a measurement system that is robust and reliable. A gage R&R study provides an understanding of the measurements system and allows for the opportunity to remove unwanted variation caused by the measurement device, methodology, or appraiser. A true understanding of the measurement system can provide the peace of mind by incorporating a design of experiment with statistical analysis for reducing type I or II errors.
ABOUT THE AUTHOR(S)
Dr Winston Sealy
Winston Sealy is an assistant professor of manufacturing engineering technology at Minnesota State University. He teaches design, metrology, and automation courses and has over 15 years of industrial experience. His areas of research are in product design and automation. He is a co-director of the Minnesota Center for Additive Manufacturing.

